Look at a photograph once for its subject, then again for the decisions inside the frame. What holds your attention? What surrounds it? What happens at the edges? This simple sequence turns looking into a useful composition exercise, even when the picture is small and you know nothing about the camera that made it.
The aim is not to identify a rule and declare the image correct. It is to become specific about what you see. A tree can divide a frame. A small figure can establish scale. An empty area can feel restful in one photograph and unresolved in another. Naming those relationships gives you something concrete to try the next time you photograph a familiar place.
The exercise below is an editorial suggestion for practice, not a report of camera testing or a formula for guaranteed results. You can use the Nomad galleries, a printed photograph or a few of your own images. Work with one photograph at a time before comparing several.
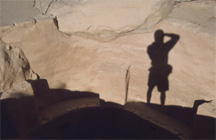
Collection photograph © Heath A. Korvola / nomad photography.
1. Name what holds your attention
Give the photograph a quick glance. Then look away and describe the first thing you remember in a short sentence: “a dark tree against the light,” “a person above a broad slope,” or “a doorway around a distant building.” Avoid beginning with a verdict such as beautiful, ordinary or dramatic. Those words express a response but do not yet explain the picture.
Look again and check your description. Was the remembered object the largest one? Was it brighter than its surroundings, unusually placed or simply recognisable? More than one answer is possible. A small person may stand out even when a mountain occupies most of the image. The purpose is to identify your own first response, not to claim that every viewer must see the same thing.
Try this with two images in the Montana Mountains collection. Choose a frame with a tree and another with a figure. Write one sentence for each before reading its location caption. Keeping the caption out of the first pass helps separate the visual arrangement from associations you already have with the place.
2. Read light and shape before detail
Next, describe the image as a few areas: light sky, dark ground, narrow vertical shape, diagonal edge. This is especially useful for small photographs, where fine texture may not be easy to see. Do not mistake a lack of visible detail for evidence about the original negative, lens or exposure. You are studying the version in front of you.
Nikon's composition guide illustrates how a brighter subject can separate from a darker background and how open space can take part in the arrangement. Those examples offer useful questions for this second pass: which shapes separate clearly, and which merge? See Nikon's examples of composing photographs.
For your own viewing notes, sketch three rough blocks rather than copying every object. If the sketch still reminds you of the photograph, you have found a few of its strongest relationships. If it does not, add one more shape and ask why that addition matters. This is a way of directing attention; it does not establish how the photographer intended the image to be read.
In the Parks collection, compare an opening, a rock formation and the reflected mountain. They offer different starting points for the same exercise. You do not need to force them into one common pattern.
3. Check the edges and the space around the subject
Move around the frame slowly: top, right, bottom, left. Name anything that is cut off, almost touching the edge or entering from outside. Then return to the main subject. Does your attention come back easily, or does an edge detail keep pulling it away? A strong edge is not automatically a mistake; it may be exactly what makes a photograph feel unsettled or active.
Nikon describes the rule of thirds as a way to position subjects and horizons, while also showing an exception for reflections. Its guidance on moving subjects suggests leaving space in the direction of travel. Treat these as alternatives to examine, rather than requirements that every photograph must satisfy. Read Nikon's five composition guidelines.
Now imagine two changes without altering the original image: a slightly tighter frame, then a slightly wider one. Say what each would remove or include. “Tighter would remove the bright corner” is more useful than “tighter would be better.” You may discover that removing a distraction also removes the only clue to the setting. That is a choice to weigh, not a problem a rule can settle for you.
4. Compare possibilities, not scores
A useful comparison asks what changed between two choices. A less useful one assigns numbers without explaining them. Instead of giving a photograph a composition score, make a pair of statements: “This version emphasises the person” and “This version gives more attention to the surroundings.” Decide which matches the purpose you have in mind.
Nikon recommends exploring a subject from different angles and distances. That advice is particularly helpful when you can return to an ordinary, accessible subject and spend time with it. Its composition examples show several approaches to a subject.
For this exercise, change only one thing in your next frame: camera height, your position or the amount of surrounding space. Keeping other choices similar makes the difference easier to describe afterwards. If you change everything at once, you may prefer the result but struggle to say which decision helped.
The Places collection is a useful reminder that a sense of location can come from a detail as well as a broad view. A sign, doorway or figure beside a boat gives you a different kind of information from a skyline. Neither approach needs to replace the other.
5. Keep the caption as honest as the picture
Write down what you know, what the caption tells you and what you are interpreting. Keep those three lines separate. You may see a person in a boat; a caption may identify a river; your interpretation may be that the scene feels quiet. Only the first two are descriptions with different sources. The third is your response.
Avoid adding a person's occupation, mood, relationship or reason for being there just because it would make a satisfying story. A smile does not establish a biography. A photograph of a climber does not provide a safe route, an equipment list or current conditions. Likewise, an old location caption does not tell you whether a place can be visited today.
For your own pictures, a useful caption can be modest: subject, place and date when you know them. Keep uncertainty visible in your notes. This habit lets a photograph remain interesting without asking it to prove more than it can show. The collection notes explain how historical captions and new editorial text are separated on this site.
6. Try a five-frame practice sequence
Choose a simple subject in a place you can photograph comfortably and appropriately: a chair near a window, a tree from a public path or an arrangement of objects at home. The exercise does not require a trip, special equipment or access to a dramatic location.
- Make a starting frame. Photograph your first arrangement and write down the subject you want the viewer to notice.
- Change the distance. Include less or more of the surroundings. Note what information disappears or enters.
- Change the viewpoint. Move a little to one side, staying within a safe and permitted position. Look for a different relationship between subject and background.
- Change the balance of space. Place the subject elsewhere in the frame while keeping your intention in mind.
- Make a deliberate choice. Return to the arrangement that best matches your stated purpose, adjusting one detail you noticed during the earlier frames.
This five-frame sequence is a suggested way to organise practice. Nikon's broader discussion of composition also encourages purposeful exercises that develop camera craft and visual choices; it does not prescribe this particular sequence. Read The Composition Triangle.
Do not delete the first four frames immediately. They are the comparison material. A final image can conceal the choices that led to it, whereas a small sequence lets you describe the difference between a first reaction and a considered frame.
7. Review with a short worksheet
Use the same questions for each frame so that your notes stay comparable. One sentence per row is enough. If an answer becomes vague, point to a specific part of the photograph and try again.
| Question | A useful kind of answer |
|---|---|
| What catches my attention first? | Name an object or area, not a quality score. |
| What separates it from its surroundings? | Describe light, shape, position or recognisable detail. |
| What happens at the edges? | Identify an inclusion, a cut-off shape or an open area. |
| What did I change? | Name the single decision between this frame and the previous one. |
| Does it serve my purpose? | Explain the effect in relation to the subject you intended. |
Finish by choosing one thing to repeat and one thing to change next time. Keep the decisions small enough to act on. “Pay attention to the bright upper corner” is a more workable note than “take better photographs.”
Then return to one image you looked at earlier. You may notice something you missed; you may also keep your original response. Either outcome gives you a clearer account of how you are looking. Start the next practice session from that observation, rather than from a rule you feel obliged to obey.